 Dashboard
After logging into AMAD, the user is redirected to the dashboard. This is the access point to everything in the platform and looks like this:
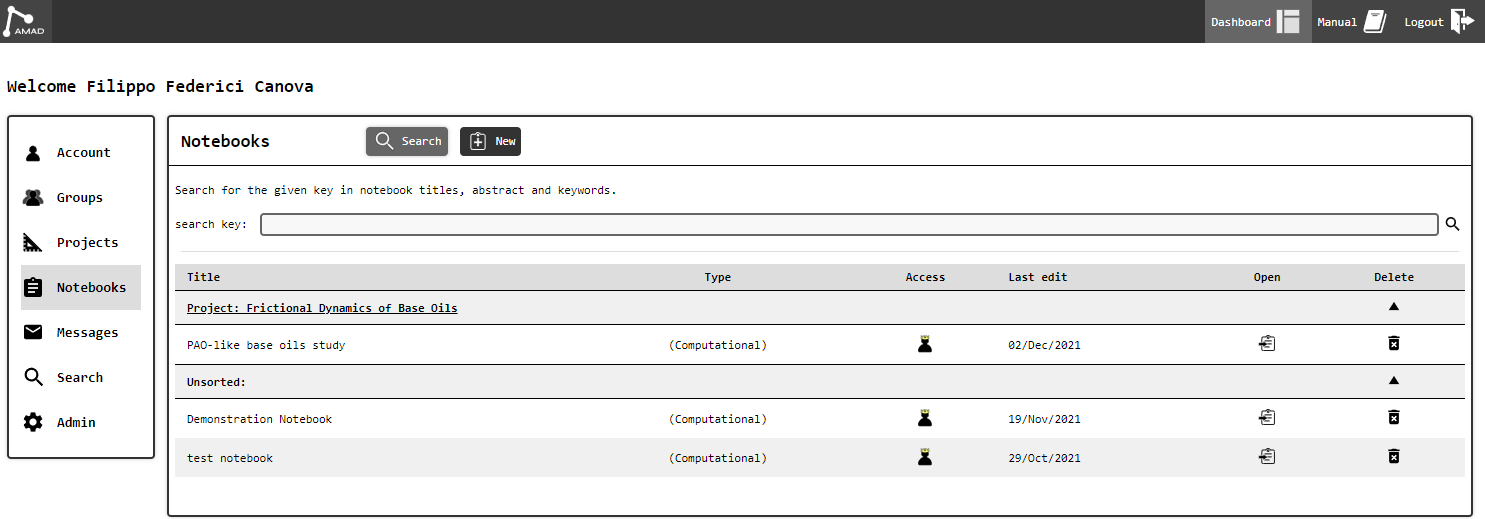
The menu on the left lists the main panels available to the user. Each panel can contain multiple tabs with different functionalities, discussed in detail in the following sections.
 Account
The Account panel allows the user to change their full name, contact email, address and password, as well as adding extra information.
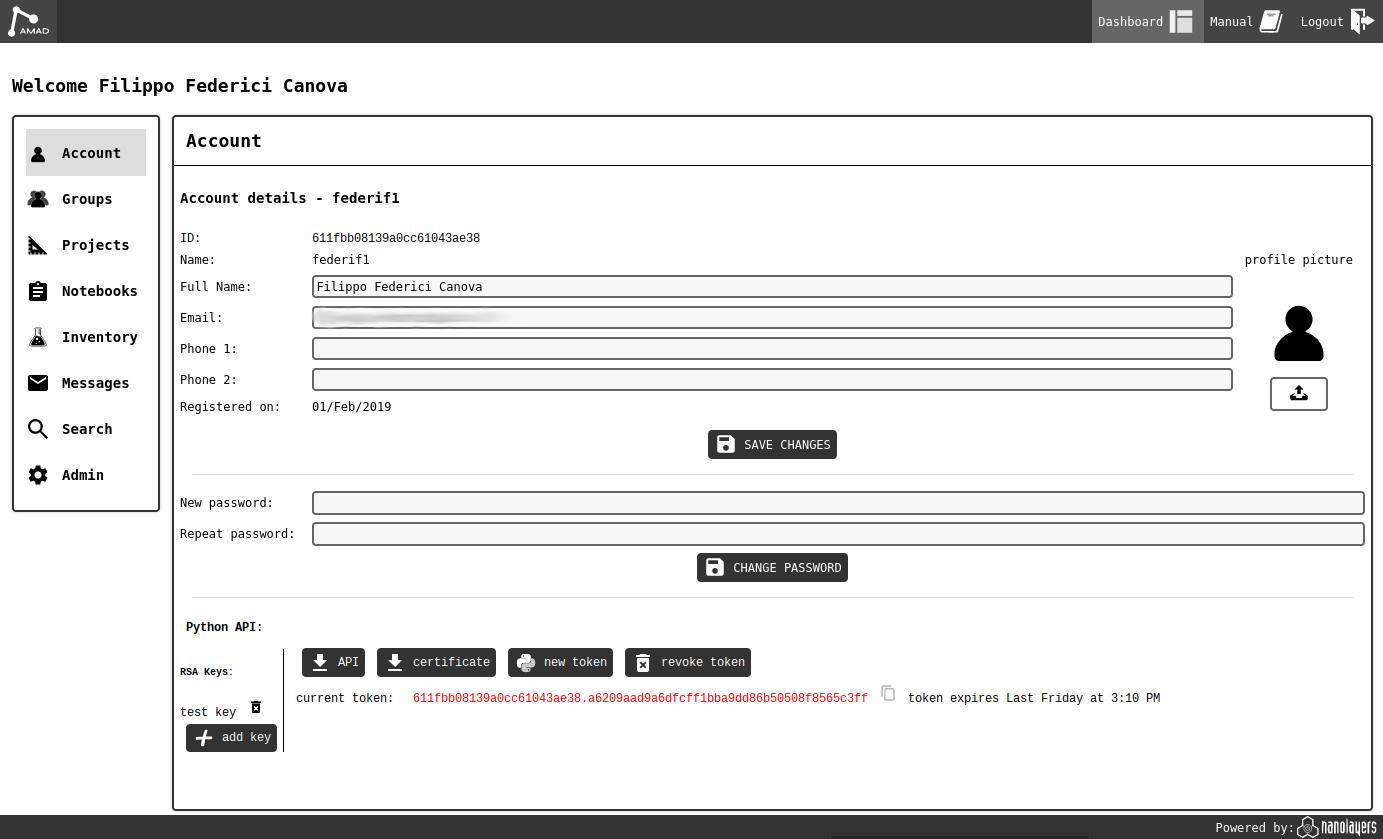
The user details will not be shown to other users on the platform, with the exception of the username and full name (if given).
From this panel it is also possible to download the Python API, and create access tokens and upload RSA keys to use it.
Note
RSA keys should be in PKCS#1 format, PEM encoded. The private key can be created with openssl:
openssl genrsa -traditional -out id_api_private.pem 2048
and the corresponding public key as follows:
openssl rsa -in id_api_private.pem -pubout -out id_api_public.pem
 Groups
Groups are logical sudivisions of users, useful when dealing with notebook access permissions.
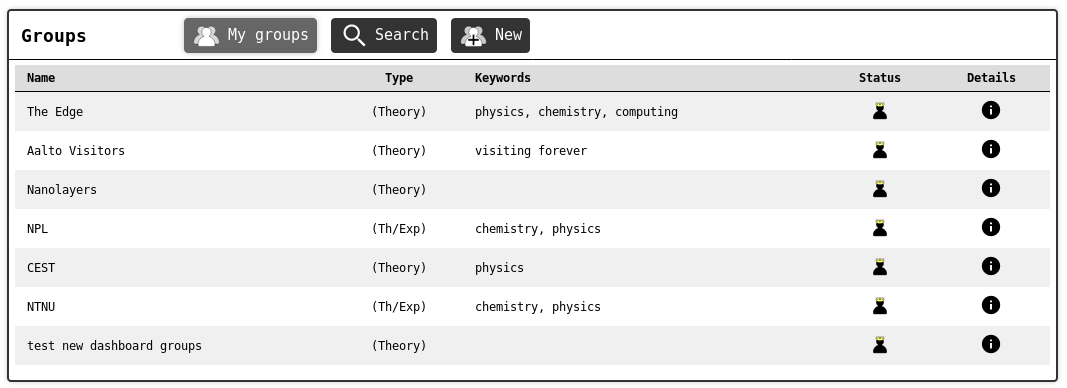
The initial tab of the Groups panel lists all groups that include the user in their roster. Other groups can be searched in the search tab.
Each entry in the list (in either main or search tab) shows the group name, type and keywords, and an icon indicating the user’s membership status in the group (owner, admin, member or not-a-member). There is also has an info (![]() ) button that opens the group’s details page.
) button that opens the group’s details page.
The New panel allows the user to create a new group after providing some basic information about it.
Groups - info page
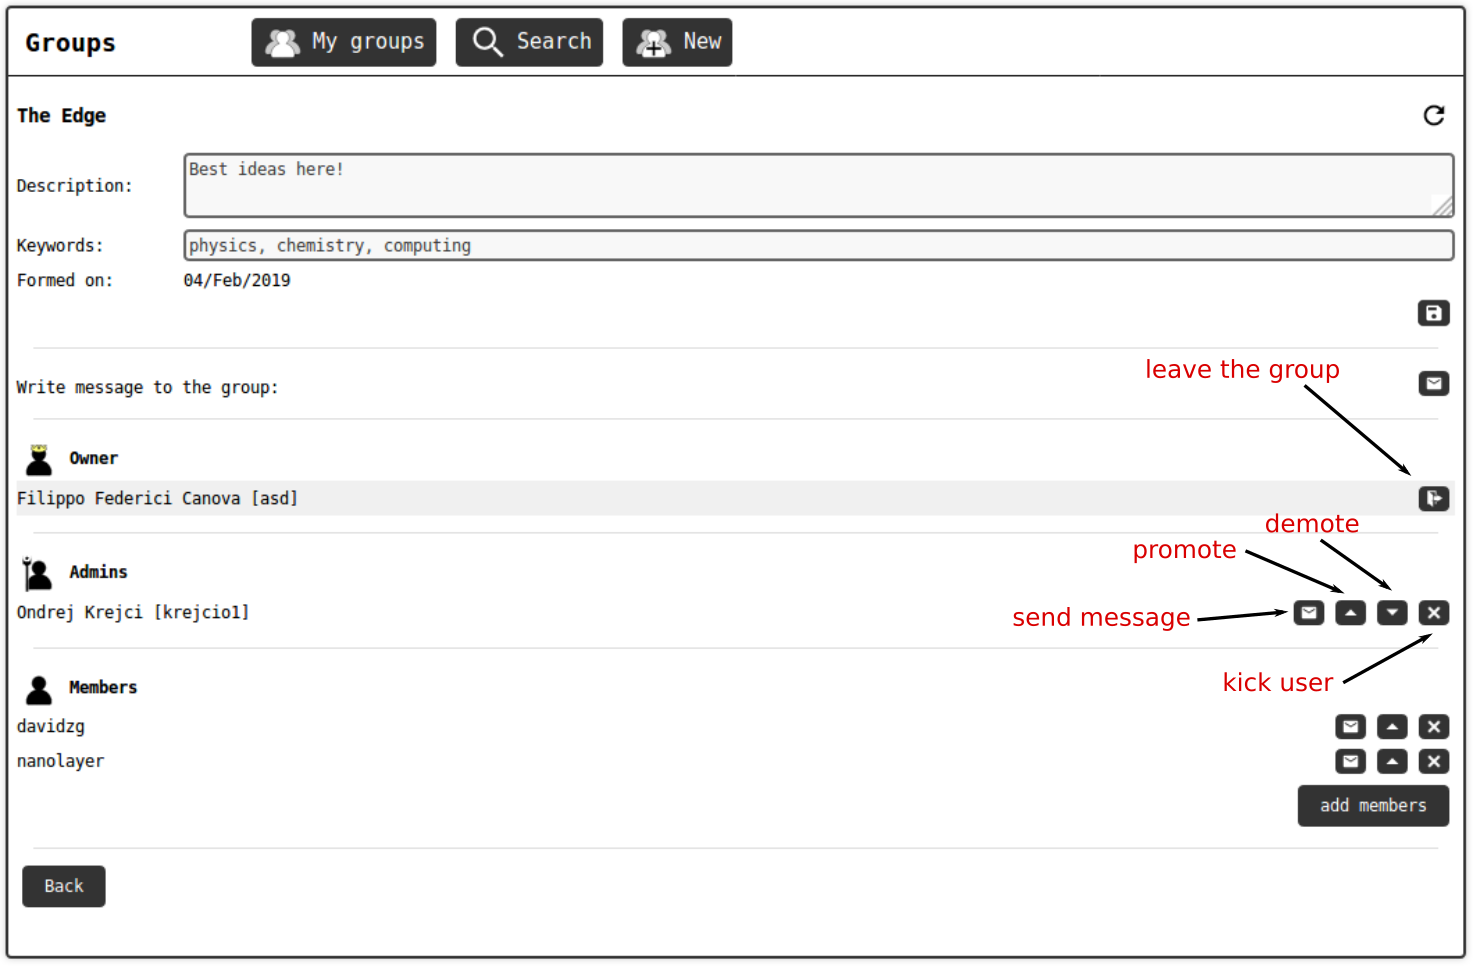
The group info page shows the extended description of the group and the complete list of members.
Description and keywords can be edited only by group administrators and owners by typing in their respective fields and clicking on the save (![]() ) button.
All members can send messages to the group: these will be visible in the messages panel by all group members, but can be permanently deleted only by administrators.
Finally, group administrators and owners can add new members to the group using the respective button.
) button.
All members can send messages to the group: these will be visible in the messages panel by all group members, but can be permanently deleted only by administrators.
Finally, group administrators and owners can add new members to the group using the respective button.
Each line in the user list has some interactive elements. Admins and owners can promote members up to their same level, and demote users with lower level. They can also kick members out of the group. The entry corresponding to the user currently viewing the page is highlighted and includes the leave button to give up membership.
Groups - New
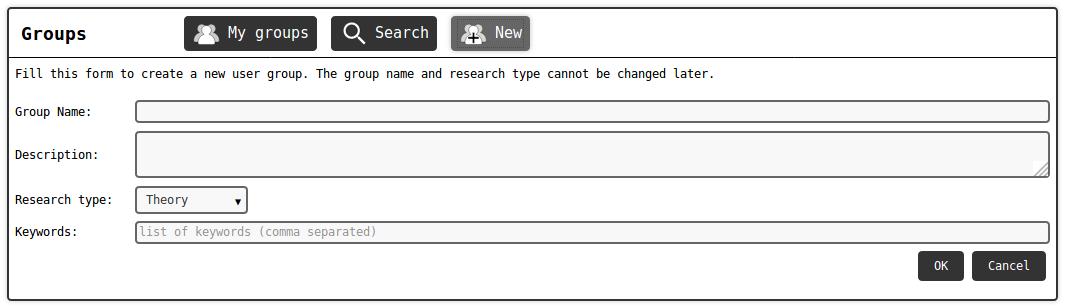
This is the panel for creating a new user group. The group name and type are mandatory and cannot be changed later, so pick wisely. The name must be unique in AMAD and the system will inform if the choice is not available. Description and keywords can be filled in or edited later in the group info page by admins and owners.
 Projects
Projects are logical containers for notebooks, meant to keep large amounts of them well sorted and manageable. A project is similar to a user group, since it has a hierarchical structure of coordinators, administrators and members. However, groups can also be included as project members.

The projects tab lists all projects the user can access. Each entry has an info (![]() ) button that will open the project details page, similar to the group one.
) button that will open the project details page, similar to the group one.
The new tab is used to create new projects. It is quite straightforward, like the one that creates new groups.
 Inventory
The inventory management system allows users to define Laboratories and the items found therein. The panel starts by listing all Labs where the user is a member:

From here it is also possible to create a new Lab.
The info button (![]() ) of each listed Lab opens the Lab Info tab with all its details. This looks much like the group or project info tab, with the same member management system, but with an additional list of items available.
) of each listed Lab opens the Lab Info tab with all its details. This looks much like the group or project info tab, with the same member management system, but with an additional list of items available.
Inventory - Equipment
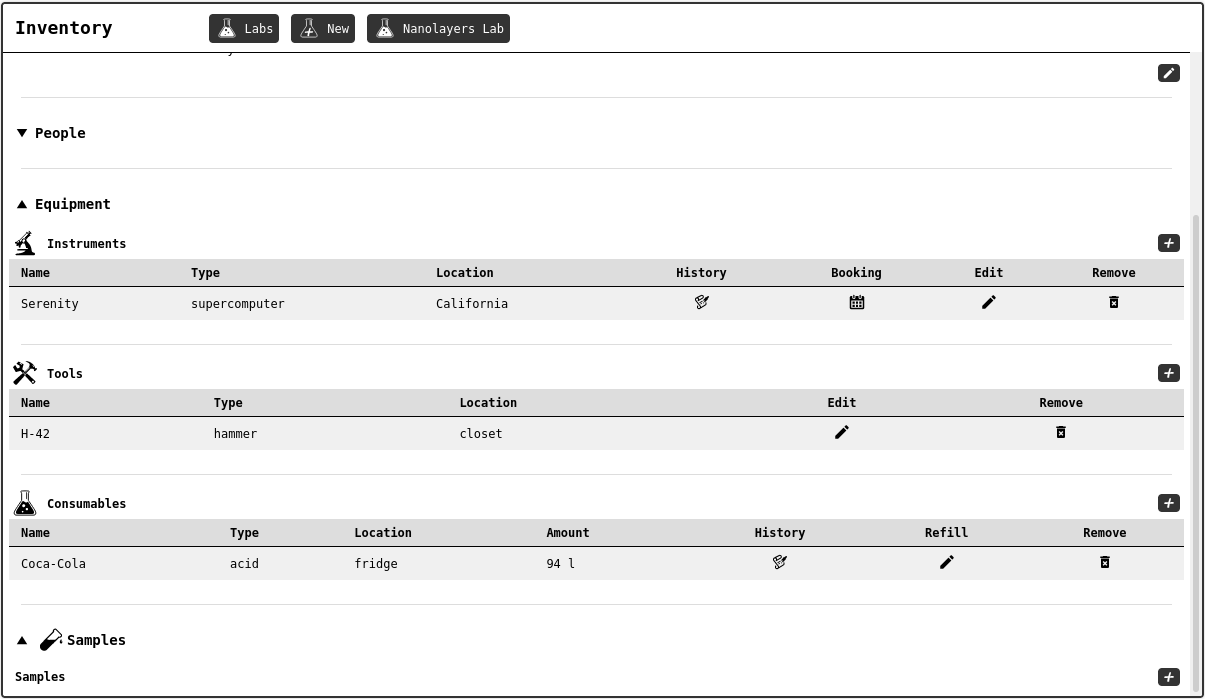
Lab info tab, showing the list of equipment available. User list and general details are not shown.
There are four lists under the equipment section: instruments (![]() ), tools (
), tools (![]() ), consumables (
), consumables (![]() ) and samples (
) and samples (![]() ).
Each can be added to the list with add button (
).
Each can be added to the list with add button (![]() ), and filling the form with appropriate information.
), and filling the form with appropriate information.
Warning
Samples are not fully implemented yet.
Instruments can be booked (![]() ) with a simple calendar interface.
) with a simple calendar interface.
Consumables show the estimated amount left in the lab. The value is calculated from the initial amount given when the item was created, the sum of all refills, minus the amounts used in notebooks (see Inventory Interaction Element).
The history button (![]() ) shows how the item has been used in notebooks and as a metadata tag in records.
) shows how the item has been used in notebooks and as a metadata tag in records.
When an item is created, a corresponding metadata tag will also become available to label data records (see Inventory Tags)
Note
Removing items will only mark them as decommisioned. The metadata tags associated to removed items can still be used in data records.
 Notebooks
Initial view of the Notebooks tab.
This panel (see image at the top of the page) shows a list of all notebooks that the current user can read or edit. The notebooks are grouped in the list according to their respective project; stray notebooks appear in the Unsorted section, at the end of the list. The starting search tab allows the user to filter the list, showing only notebooks that contain the given search key in their title, abstract, or keywords.
Clicking on the title or the ![]() button will open the corresponding notebook in the Notebook Editor.
button will open the corresponding notebook in the Notebook Editor.
Creating a Notebook
The New (![]() ) tab is used to create a notebook.
) tab is used to create a notebook.
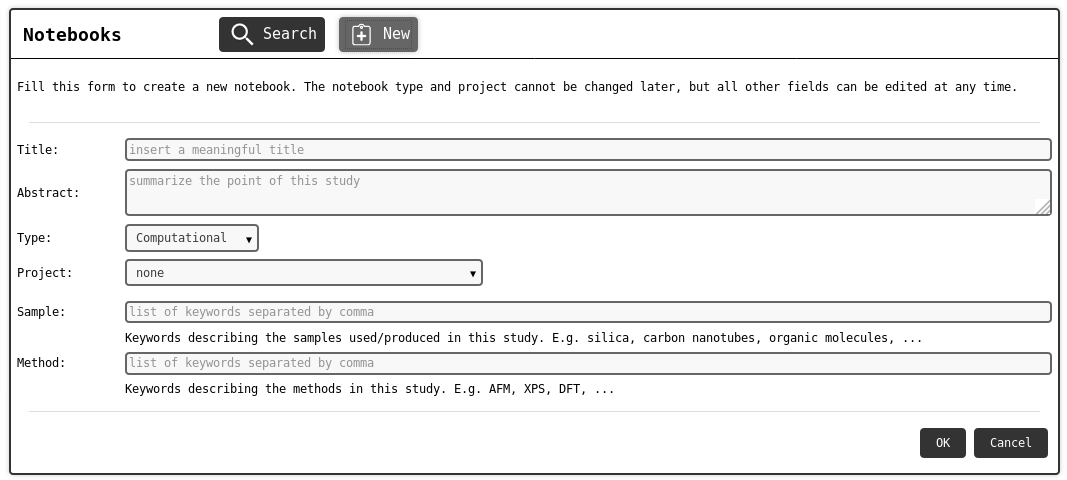
Title and abstract are mandatory. All fields except notebook type can be edited after the notebook is created.
 Messages
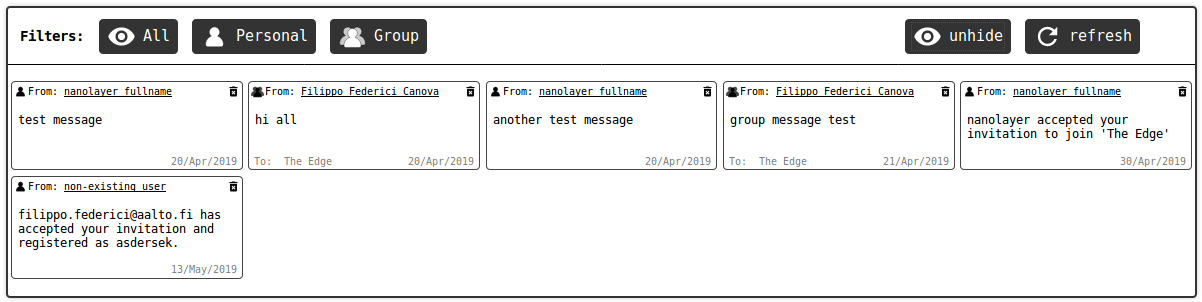
This panel shows all internal messages sent to you personally, or to a group you belong to. Currently AMAD does not have real-time instant messaging capabilities, thus the refresh button can be used to update the list. Personal messages can be permanently deleted by clicking on their trash icon. Group messages can only be deleted by group administrators. A regular member can anyway hide those messages from view by clicking on their hide icon. Hidden messages can later be re-activated with the unhide button.
 Search
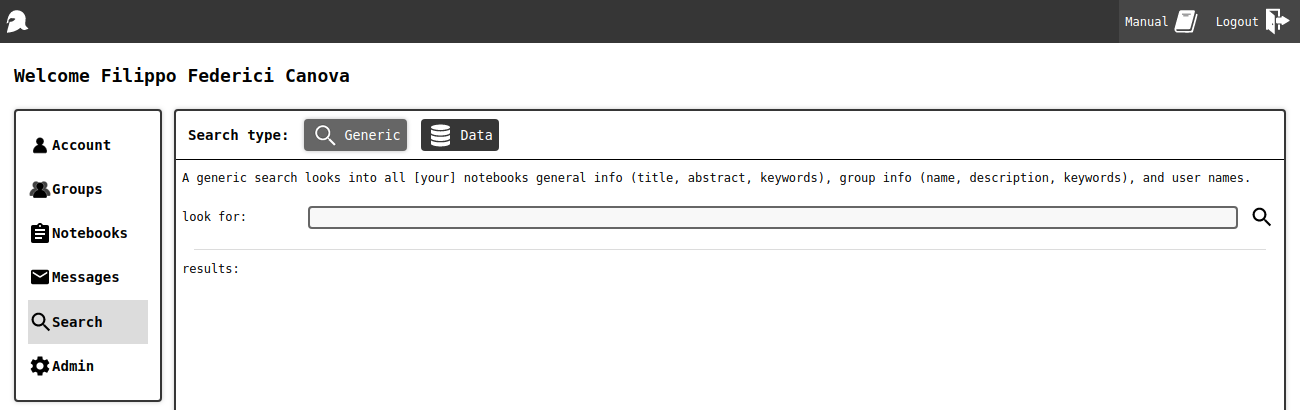
The search panel is the place to go to look for anything from a generic user account to a specific data record in a notebook.
Generic Search
A generic search retrieves elements of different type (users, groups and notebooks) by looking for the given string into the following fields:
- users
name
full name
- groups
name
description
keywords
- notebooks
title
abstract
method/sample keywords
If the search string is found in any of these fields (case insensitive), the element will appear in the list of results, just below the search bar.
Data Search
This option allows the user to search for specific data records in all notebooks that the user can access (at least read permission).
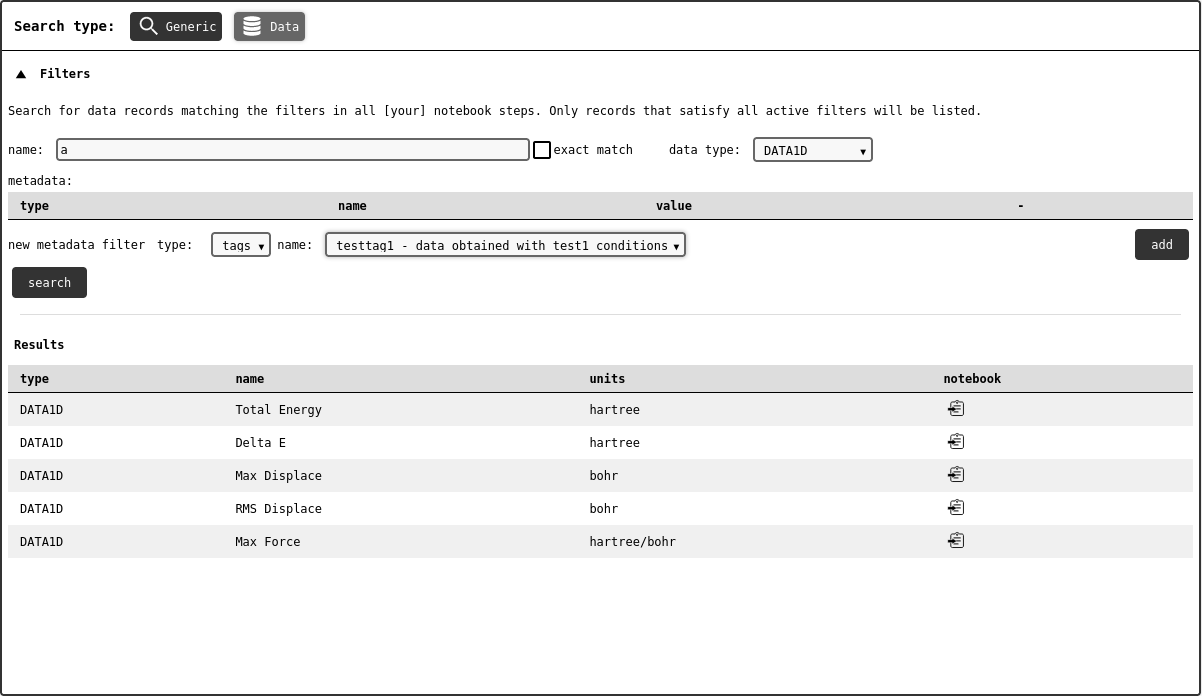
Data records can be filtered by name, type and metadata.
The name filter will exclude all records with a name that does not match the given regular expression. Check the adjacent box to enforce an exact string match instead.
The type filter will exclude all records that do not have the given type.
The metadata filter will exclude all records that do not have the given tags and v-tags. If v-tags are added to the criteria, the the v-tag value will be matched to a regular expression (an exact match can also be enforced). For example, this is useful to retrieve all records measured at a given temperature. See this section for more information about metadata.